https://youtu.be/EAcD5ueqvHQ?si=tJ21_L9IAaKYkDID
저번 강의에서 간단하게나마 백엔드 구성이 끝났다. 플라스크와 SQLAlchemy, pgcopg2 를 활용하여 간단하게 이벤트 테이블의 모델을 만든 다음 CRUD를 구성했다.
Frontend 구성하기
요즘 리액트 프로젝트는 vite 를 쓰는게 대세지만 예전 강의 특성상 cra을 쓰고 있다. 일단은 강의에 따라가기 위해 오랜만에 cra를 사용하고, axios 와 date-fns 를 다운 받아준다.
date-fns
기존의 날짜/시간 관련 라이브러리는 day.js 만 알고 있었는데 해당 라이브러리를 새로이 알게 되었다.
https://www.npmjs.com/package/date-fns
date-fns
Modern JavaScript date utility library. Latest version: 3.3.1, last published: a month ago. Start using date-fns in your project by running `npm i date-fns`. There are 16532 other projects in the npm registry using date-fns.
www.npmjs.com
간단하게 사용법을 보자면 Date 클래스를 사용하여 만들어준 날짜 객체를 해당 라이브러리의 특정 함수를 사용하여 포맷팅이나 시간 차이 등을 간단하게 구현해줄 수 있다.
import { format, formatDistanceToNow } from 'date-fns';
import { ko } from 'date-fns/locale';


console.log(formatDistanceToNow( new Date( 날짜 ), { addSuffix: true, locale: ko } );
// 특정 날짜와 현재 시간 차이 출력 -> X분, addSuffix 를 true 하면 ~ 전이 붙는다

console.log(format( new Date(날짜), 'PPP EEE p', {locale: ko} );
// PPP: 날짜, EEE: 요일, p: 시간의 의미를 갖는 형식, 지정된 형식으로 날짜를 포맷팅한다
만들어준 리액트 프로젝트는 npm start 로 시작하게 되며, 어제 플라스크 템플릿으로 간단하게 만들었던 그 화면을 리액트로 만들게 될 것이다. (이러면 플라스크 내부 return 부분을 다시 수정해줘야겠네..)
단순히 플라스크로 구현해준 /events 로 get 해보면 네트워크 오류가 발생함을 알 수 있다. 이는 CORS 설정을 안해줘서 생기는 오류이다.
const fetchEvents = async () => {
    const data = await axios.get(`${baseUrl}/events`);
    console.log("DATA: ", data);
};

// ...

 useEffect(() => {
    fetchEvents();
}, []);
CORS
브라우저는 보안의 이유로 cross-origin HTTP 요청들을 제한한다. 즉 서버측의 동의가 없으면 브라우저 요청을 허락하지 않는다는 것이다. 이렇게 요청을 제한하는 것은 HTTP header 를 이용하여 조절이 가능하고, 이를 CORS(Cross-Origin Resource Sharing) 라고 한다.
그럼 cross-origin 은 무엇을 의미하는건가?
- 프로토콜 (HTTP / HTTPS)
- 도메인
- 포트번호
위 3가지 요소들을 확인하고 한 가지라도 다르면 브라우저에서 거절하게 된다.
작동 방식
서버에 요청 -> 서버의 응답 -> 브라우저가 요청한 Origin과 응답한 헤더 비교(Access-Control-Request-Headers)
아래의 요청에 해당하면 추가적으로 확인하지 않고 바로 요청을 보내게 된다.
| HTTP method | 헤더 | Content-Type |
| GET, HEAD, POST | Accept, Accept-Language, Content-Language | application/x-www-form-urlencoded(기본값), multipart/form-data, text/plain |
플라스크 서버에서 CORS 문제를 해결하기 위해선? 간단하다. flask-cors를 설치하고,
from flask_cors import CORS

//...
CORS(app)
그러면 위의 에러창은 더이상 보이지 않고 콘솔에 받은 요청을 보면
const fetchEvents = async () => {
    const data = await axios.get(`${baseUrl}/events`);
    const { events } = data.data;
    setEventsList(events);
};
data > events 에 잘 담겨있다. 이제 포스트그리에 저장된 튜플들이 잘 조회될 것이다.
추가 / 삭제
리액트 특성상 useState 로 프론트 안의 정보들이 바로 업데이트 되게끔 구현했다.
const handleSubmit = async (e) => {
    e.preventDefault();
    try {
      const data = await axios.post(`${baseUrl}/event`, {
        description: description,
      });
      setEventsList([...eventsList, data.data]);
      setDescription("");
    } catch (err) {
      console.error(err.message);
	}
};

const handleDelete = async (id) => {
    try {
      await axios.delete(`${baseUrl}/events/${id}`);
      const updatedList = eventsList.filter((event) => event.id !== id);
      setEventsList(updatedList);
    } catch (err) {
      console.error(err.message);
    }
};
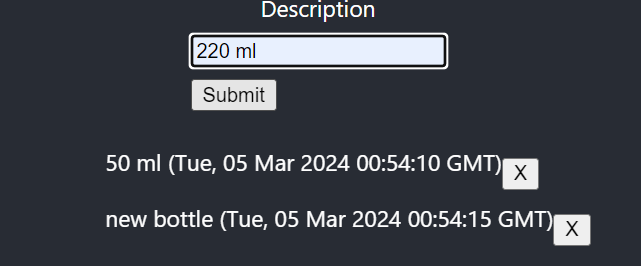
따로 스타일링은 하지 않았지만 플라스크 서버에서 구동 중인 목록 조회, 추가, 삭제의 기능을 포함하여 구현이 끝났다.


수정
@app.route('/events/<id>', methods=["PUT"])
def update_event(id):
    event = Event.query.filter_by(id = id)
    description = request.json['description']

    event.update(dict(description=description, created_at = datetime.now()))
    db.session.commit()

    return {'event' : format_event(event.one())}
const handleChange = (e, field) => {
if (field === "edit") {
setEditDescription(e.target.value);
} else {
setDescription(e.target.value);
}
};
const handleSubmit = async (e) => {
e.preventDefault();
try {
if (editDescription) {
const data = await axios.put(`${baseUrl}/events/${eventId}`, {
description: editDescription,
});
const updatedEvent = data.data.event;
const updatedList = eventsList.map((event) => {
if (event.id === eventId) {
event = updatedEvent;
}
return event;
});
setEventsList(updatedList);
} else {
const data = await axios.post(`${baseUrl}/event`, {
description: description,
});
setEventsList([...eventsList, data.data]);
}
setDescription("");
setEditDescription("");
setEventId(null);
} catch (err) {
console.error(err.message);
}
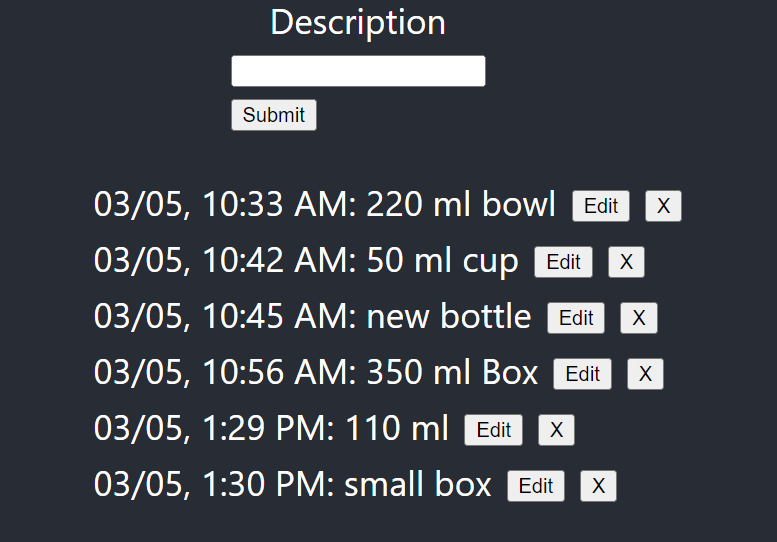
};이런 식으로 수정도 가능하게 만들었다.

SQLAlchemy 사용법을 간단히 알게 되었다. 이를 바탕으로 플젝에 사용할 수 있게끔 연습 삼아 만들어볼 예정이다.
'Python > Flask' 카테고리의 다른 글
| Flask-session 으로 서버에서 세션 관리 (0) | 2024.03.09 |
|---|---|
| SQLAlchemy - filter + 조회 예시 (0) | 2024.03.07 |
| Flask + PostgreSQL + React - 1 (0) | 2024.03.05 |
| Jinja2 and Werkzeug? (0) | 2024.03.04 |
| flask 웹개발 기초 정리 - 3 (feat. SQLAlchemy) (1) | 2024.02.28 |


